

 While the head and hands will be vinyl - you have a choice of two different types of body - one is referred to as Cortex and the other as Vinyl. Both body types are pre-built.
Barebones Kit
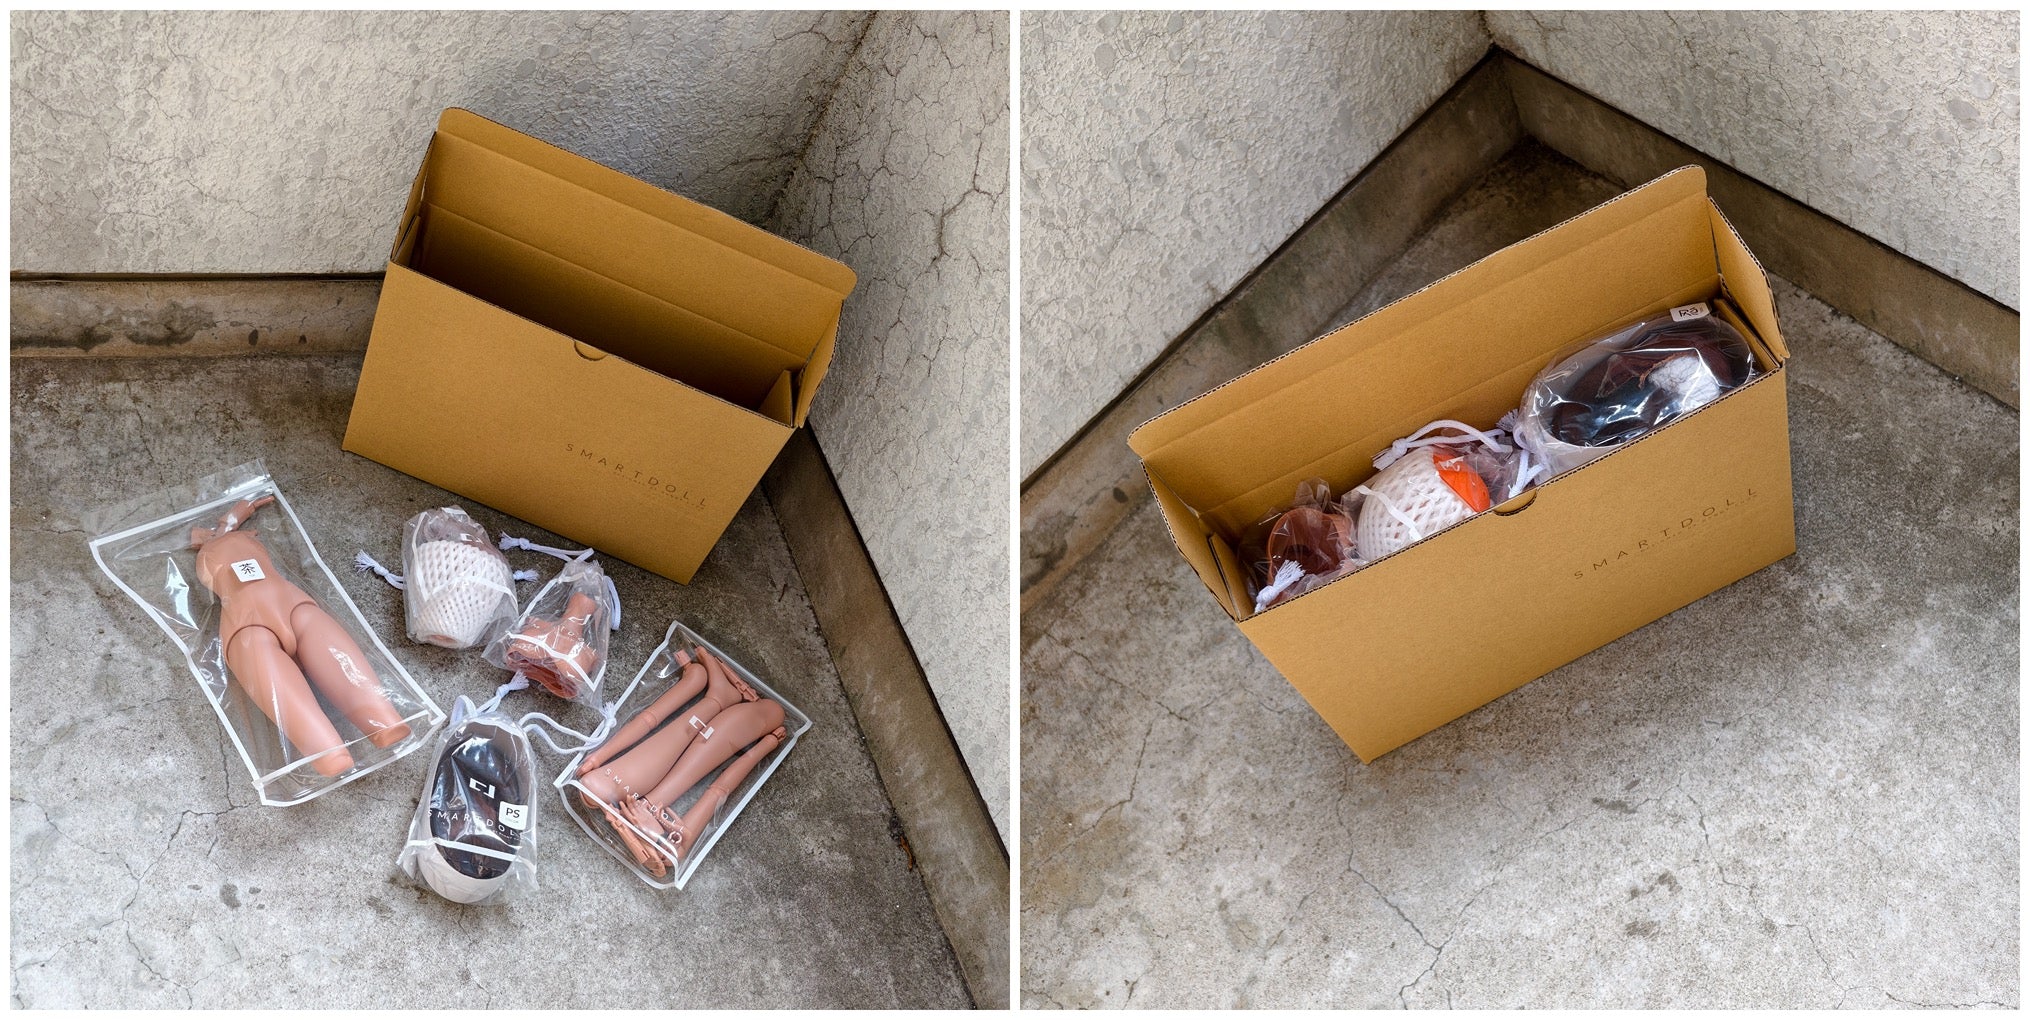
The Barebones Kit is a partially assembled Smart Doll kit designed for a more compact and cost-effective shipping option. We’ve removed items that many owners already have at home — such as the stand, sports bra, and bag — to reduce clutter and keep things simpler. While the kit is relatively straightforward to assemble, a bit of dexterity is required, and it comes at a slightly lower price point.
One of the biggest advantages of this approach is its more sustainable packaging. The Barebones Kit ships in a smaller tier-one box, which uses less plastic and cardboard compared to our fully assembled packaging. This compact design costs less than half the price of shipping a fully assembled doll to the United States via DHL. It not only lowers shipping costs but can also reduce the overall declared value (including shipping) used to calculate import duties — making it a more cost-effective and eco-friendly option for many customers.
If you’d prefer a fully built doll, please choose the Fully Assembled version instead.
Attaching the Arms and Shins
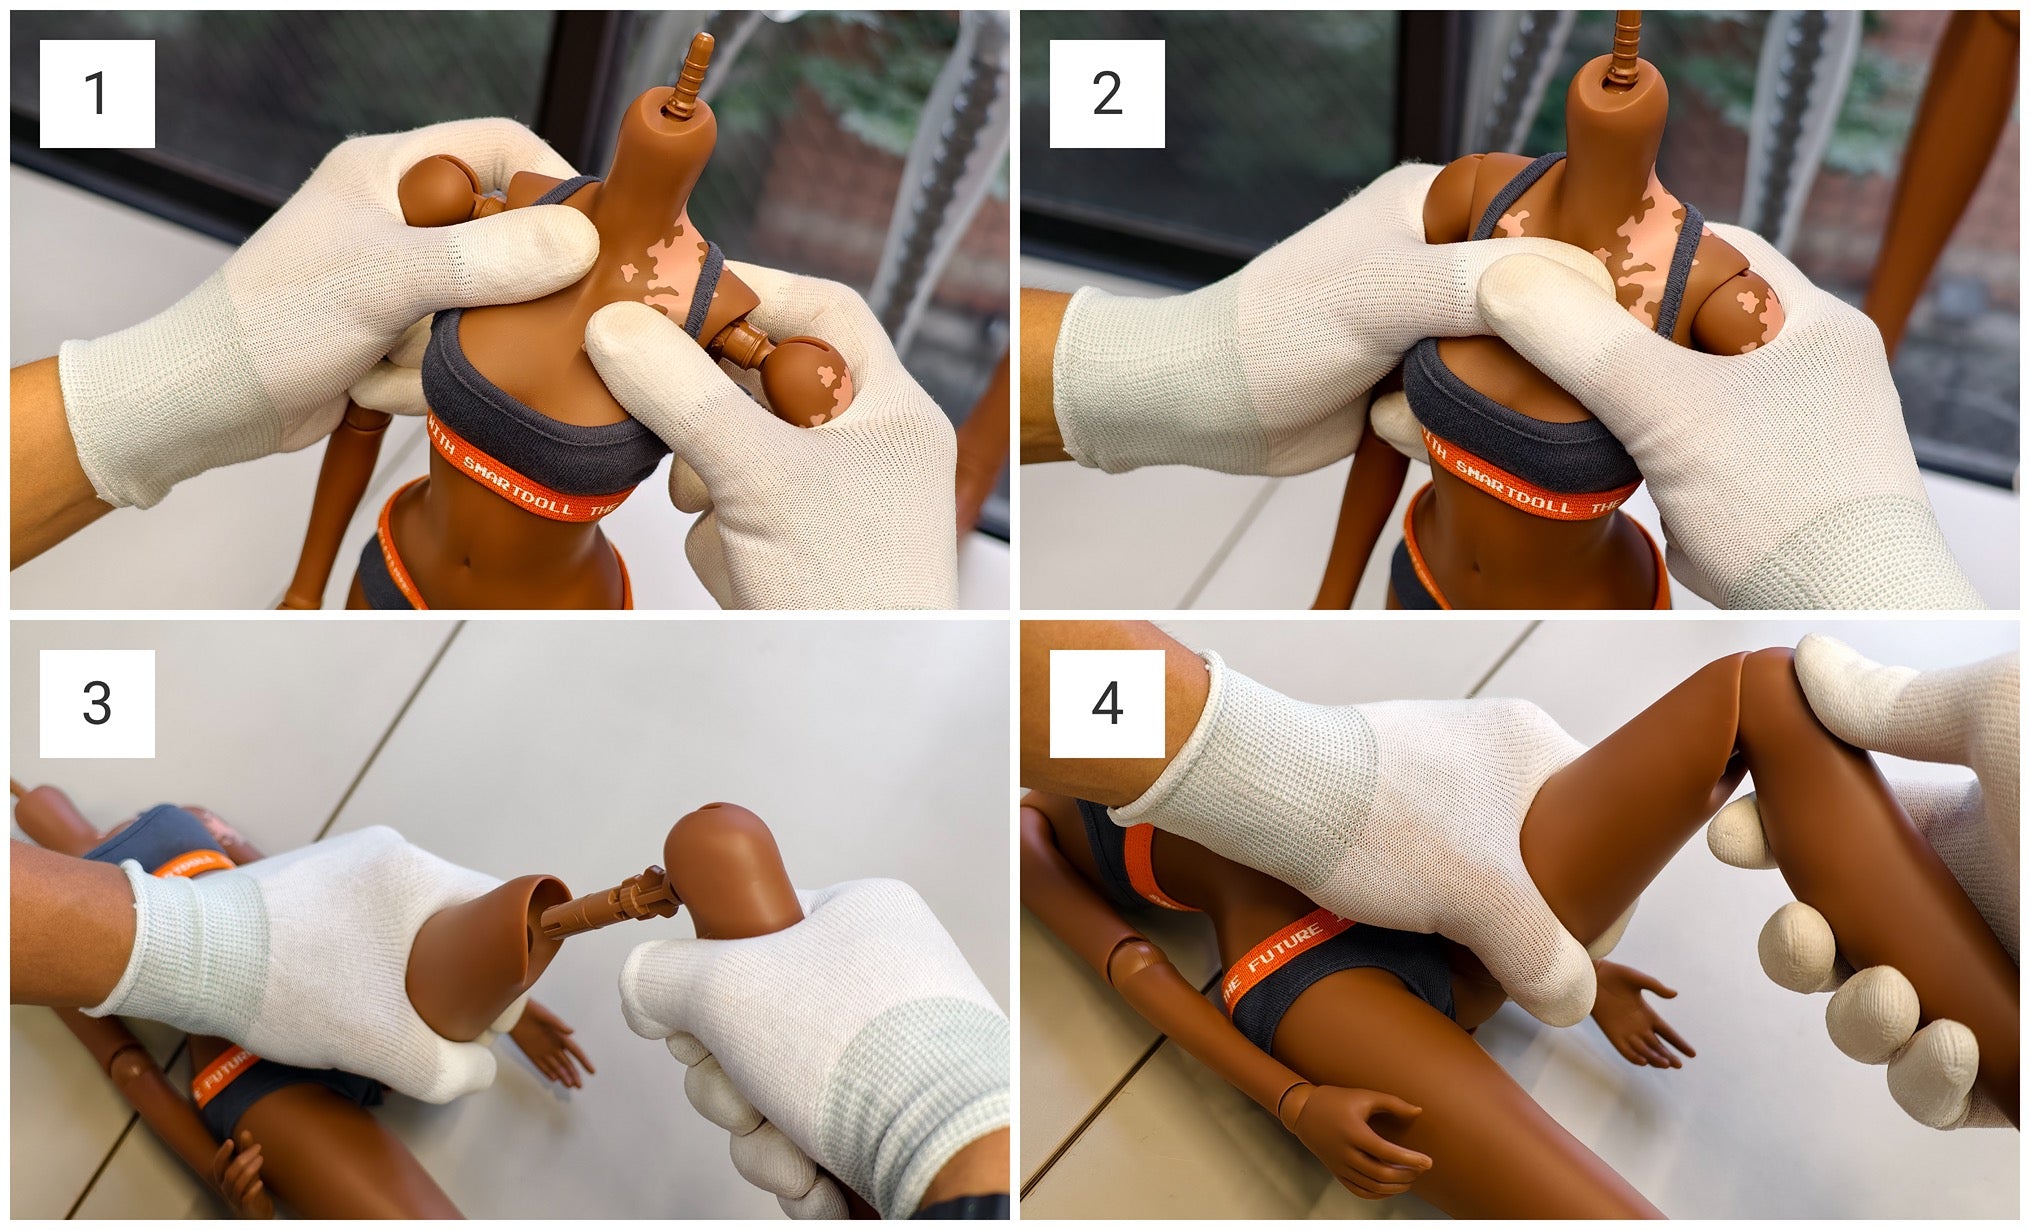
Step 1 (Photo 1)
After attaching the bust, align the arm plug with the shoulder socket and gently guide it into place.
After attaching the bust, align the arm plug with the shoulder socket and gently guide it into place.
Step 2 (Photo 2)
Clasp your hands around both shoulders and push both arms in simultaneously — this method is easier than inserting them one by one. Make sure you feel a solid click. If you only feel a dull click, the arm may not be fully secured and could fall off when rotated.
Clasp your hands around both shoulders and push both arms in simultaneously — this method is easier than inserting them one by one. Make sure you feel a solid click. If you only feel a dull click, the arm may not be fully secured and could fall off when rotated.
Step 3 (Photo 3)
Rotate the thigh into a sitting position. Align the shin peg with the socket at the bottom of the thigh, ensuring proper alignment; if the peg isn’t seated correctly, the shin may detach easily.
Rotate the thigh into a sitting position. Align the shin peg with the socket at the bottom of the thigh, ensuring proper alignment; if the peg isn’t seated correctly, the shin may detach easily.
Step 4 (Photo 4)
Keep the shin peg and shin at a 90-degree angle and push the shin firmly onto the peg until it locks securely in place. This step requires a bit of force — designed intentionally to minimize the risk of the shin slipping off during movement.
Keep the shin peg and shin at a 90-degree angle and push the shin firmly onto the peg until it locks securely in place. This step requires a bit of force — designed intentionally to minimize the risk of the shin slipping off during movement.
Step 5 (no photo!)
Attach the head by aligning the neck joint with the head socket and pressing down firmly until it sits flush. Ensure there is no visible gap between the neck and the head socket — this confirms the head is securely attached.
Attach the head by aligning the neck joint with the head socket and pressing down firmly until it sits flush. Ensure there is no visible gap between the neck and the head socket — this confirms the head is securely attached.
Other Articles in “ Production Production ”

Why Your Smart Doll Arrives Wearing a Sports Bra
The logo on the default sports bra is gradually transitioning from Roman characters to Katakana as older stock is depleted. Some Smart Dolls are already shipping with the updated version. ( learn more learn more )

Smart Doll Wheelchair - Free STL Files
We started exploring a Smart Doll wheelchair after hearing from folks in the community who wanted better ways to represent their everyday reality. ( learn more learn more )

Before You Buy - Porcelain White
Before choosing a Porcelain White Smart Doll, please take a moment to review the notes below. Our goal is to ensure clarity upfront so there are no surprises later. ( learn more learn more )